

How to Create 30 Days of Social Media Content at Once
May 1, 2023
Design Cheat Codes to Instantly Improve Your Branding
July 21, 2023How to Take Great Photos for Your Farm or Food Brand with Your Phone
When you want to build a brand, improve your marketing, and grow interest from new and current customers, there’s one tool you should look to again and again: photography. Great imagery communicates the value of a product in a way words simply can’t. If you want to make an impression, start with good photos.
It’s true that professional photography has a way of elevating things instantly, but it can be expensive when you’re starting out. The good news is that thanks to TikTok and Instagram, real-life photos (i.e. not taken professionally) are not only acceptable, they’re a smart marketing move. Customers want to see the reality of what you do on a consistent basis, and taking photos with your phone is the easiest way to deliver.
However, there is a difference between a grainy off-centered photo from a phone and a truly great real-life photo. Fortunately, it only takes a few changes to elevate your photography skills and level up your marketing.
The Phone
If you have an old phone, it’s time to upgrade. Don’t forget you can write it off as a business expense. The cameras on modern phones, whether Apple or Android, are pretty amazing and can rival any DSLR (that’s the acronym for a fancy professional camera). So get yourself a recent model and use these three tips to start taking beautiful photos yourself. All the examples in this blog were shot in an iPhone.
Good Light
Light is the single most important factor in great imagery. It can take years to hone your eye to see light in the way a professional photographer does (another advantage to hiring someone when the budget allows), but that doesn’t mean there aren’t some shortcuts.
Shortcut #1: Shoot inside a greenhouse or high-tunnel.
Greenhouses and tunnels wrapped with plastic do something really special: they diffuse light. They spread it out evenly, which makes everything brighter and more beautiful. You don’t have to know how it works to take advantage of the effect. Just take your product into the greenhouse or high tunnel and snap away. This works especially well on sunny days.
That sweet, sweet greenhouse light. This image is also a good example of shooting overhead and close-up–see below
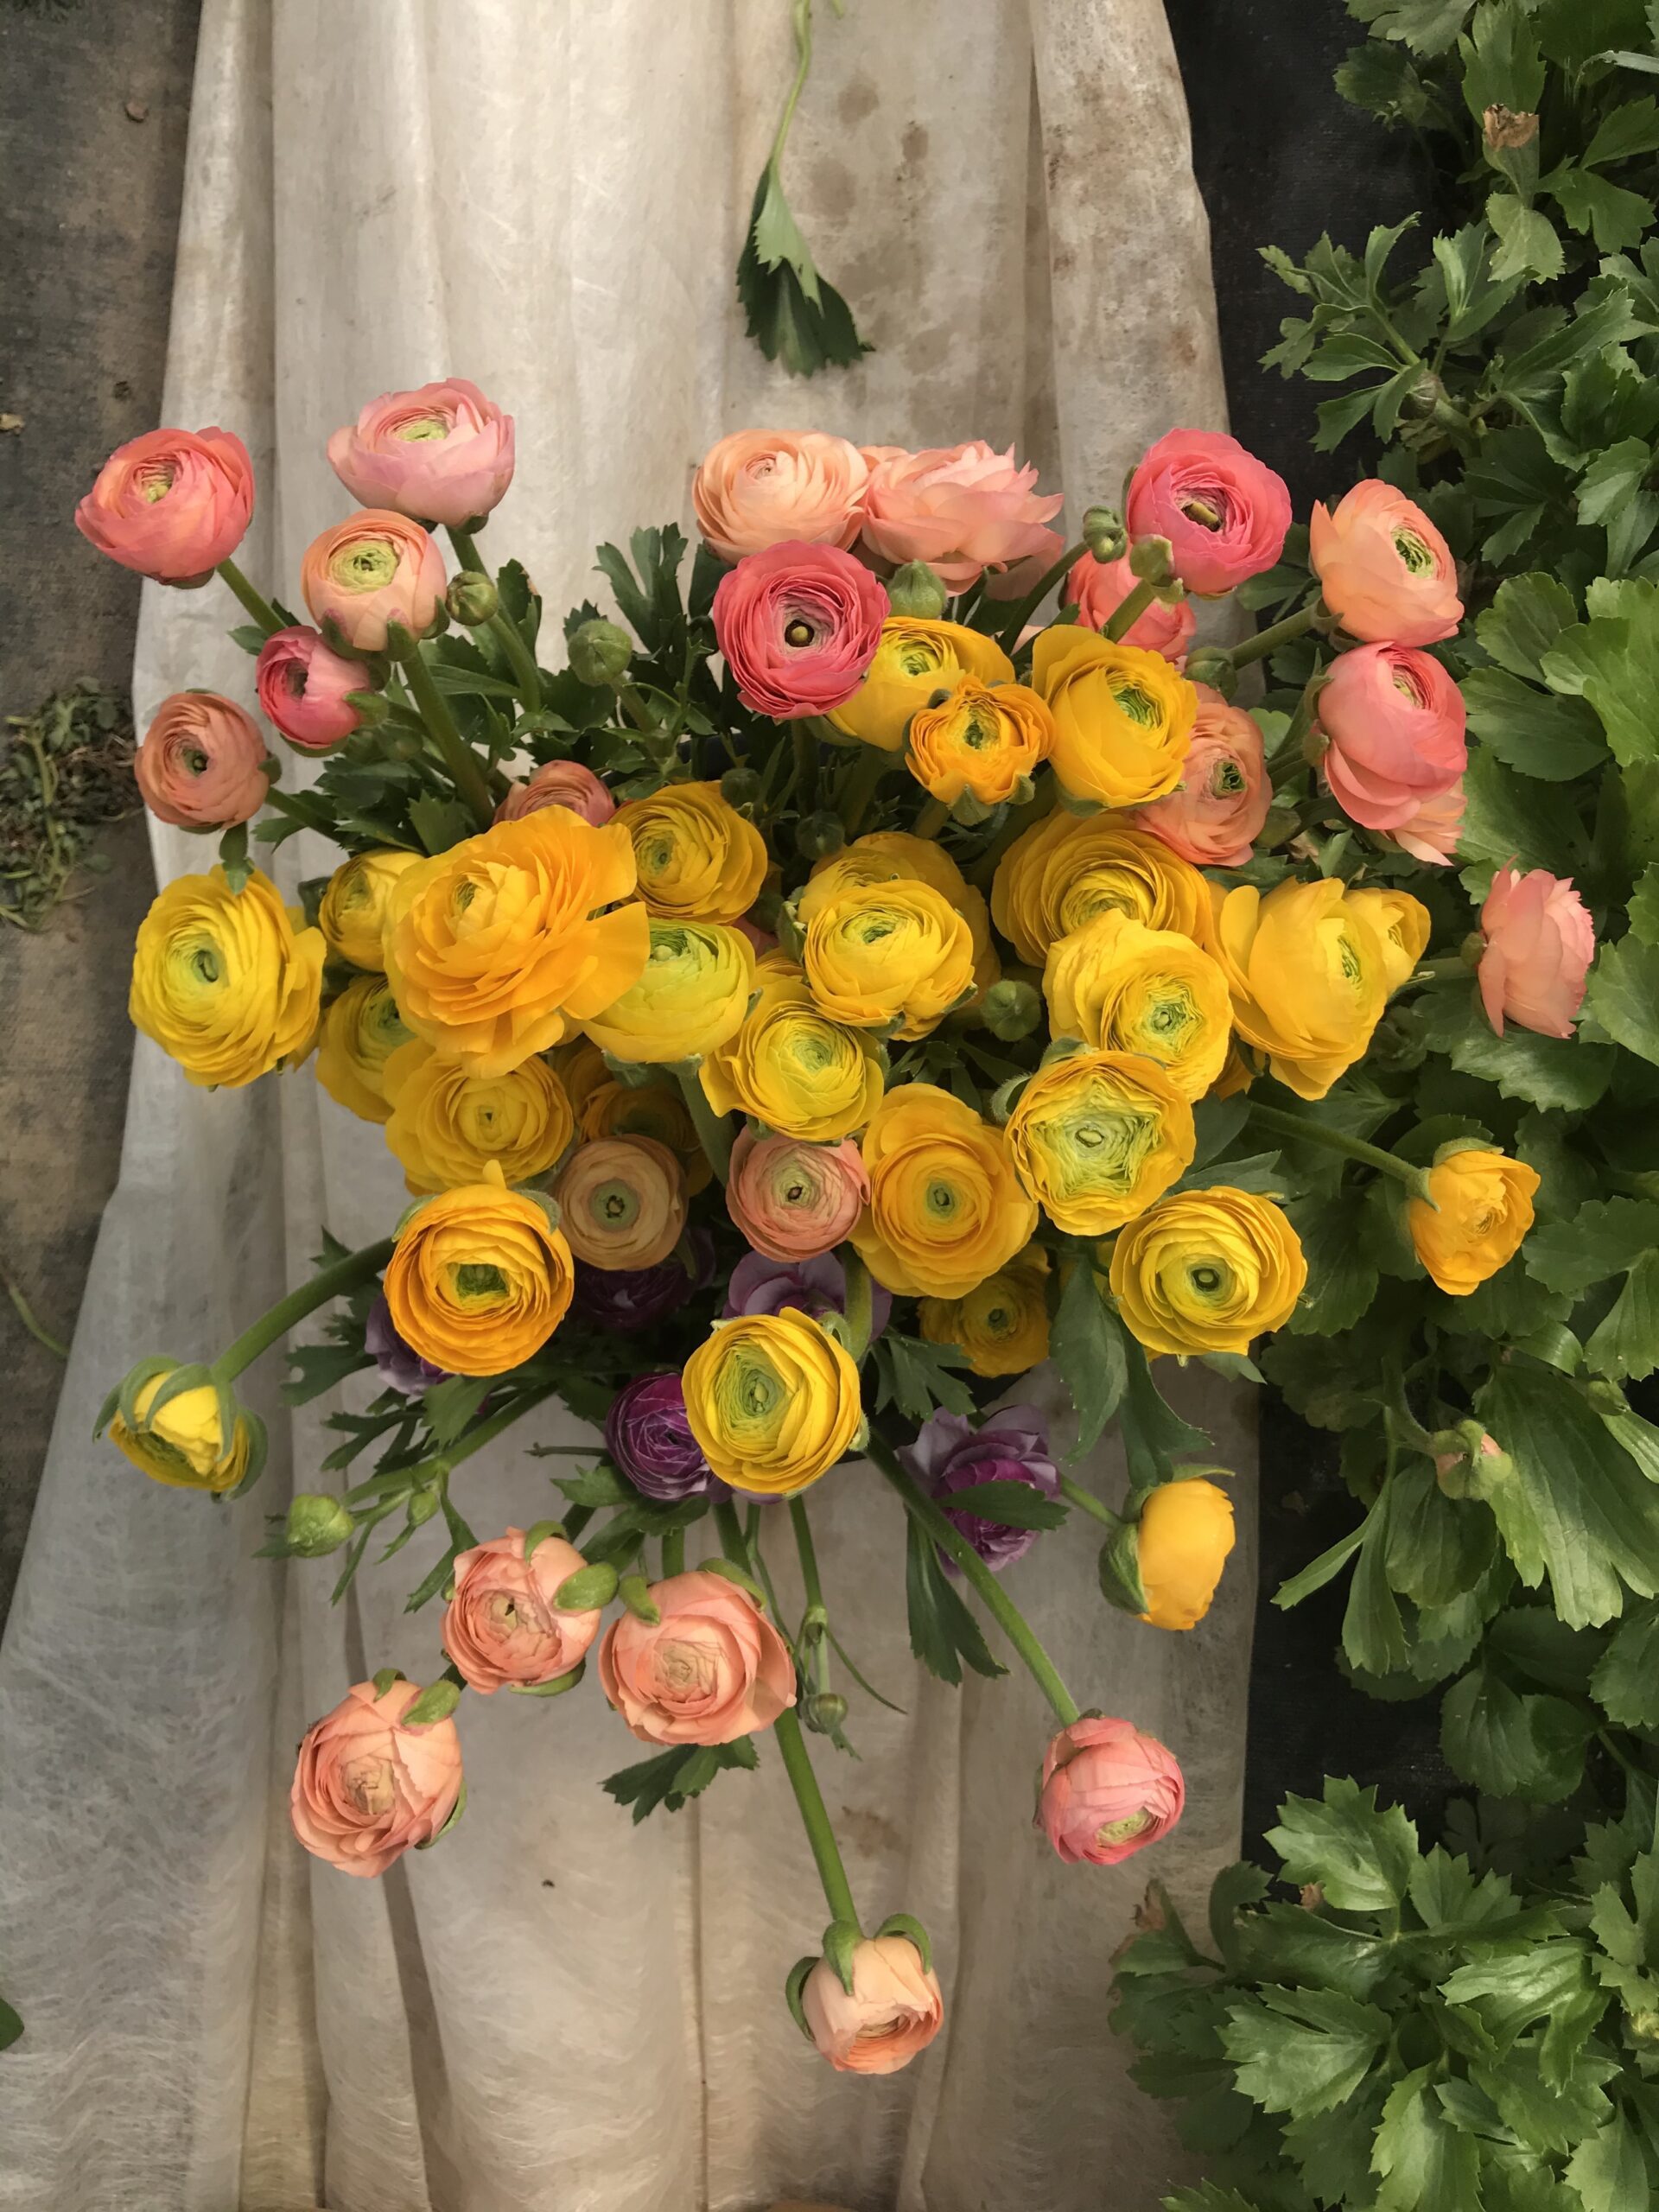
These are obviously flowers and not food, but the principle applies! The diffused light inside the high tunnel creates a stunning image with zero effort or editing.
Shortcut #2: Shoot in “open shade.”
Look for shadows cast by buildings, where there is a large patch of consistent shade but no roof over your head. Place your product or subject in the shade, as close to the edge (where the shade meets sunlight) as possible.

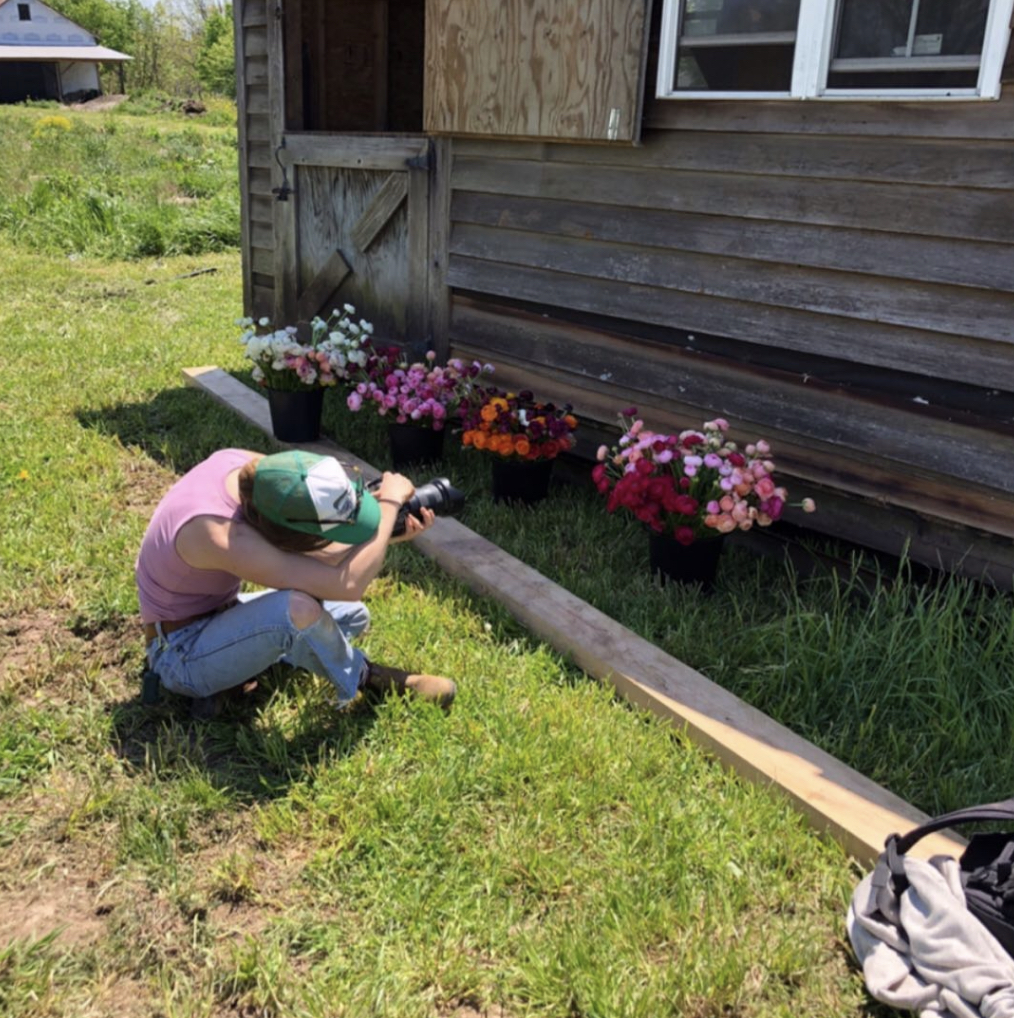
I’m using my fancy camera in this photo, but you can see how I’ve arranged the subjects in open shade. Ideally, the buckets would be a little closer to the edge of the patch of shade, but I didn’t want to deal with moving the 2×4!
Avoid dappled shade cast by trees unless you want to create a very purposeful effect. Most of the time, these types of shadows just create harsh contrast and distraction in your photos.
Shortcut #3: Shoot inside the doorway of a barn or shed.
This is my favorite trick for getting gorgeous, artistic light that makes you go “Wow!” with no effort at all. Stand inside the barn or shed as close to the opening as possible and place your subject directly in the doorway. Stand inside the barn/shed and shoot down onto your subject. It’s a moody, beautiful effect.
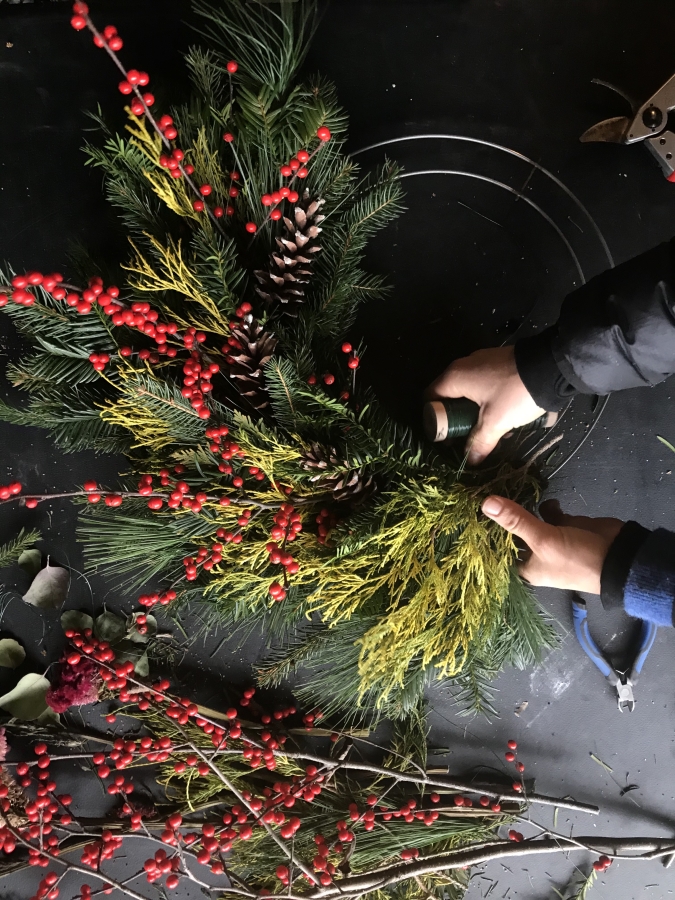
This was shot directly inside the doors of a large shed. The black background, which is just a cheap folding table the farmers use at market, really ups the drama.
This was shot directly inside the doors of a tiny garden shed.
In this photo, I’ve positioned the board at the edge of a loading dock that had a large garage door opening.
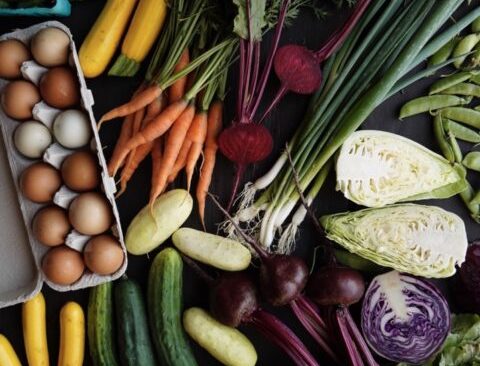
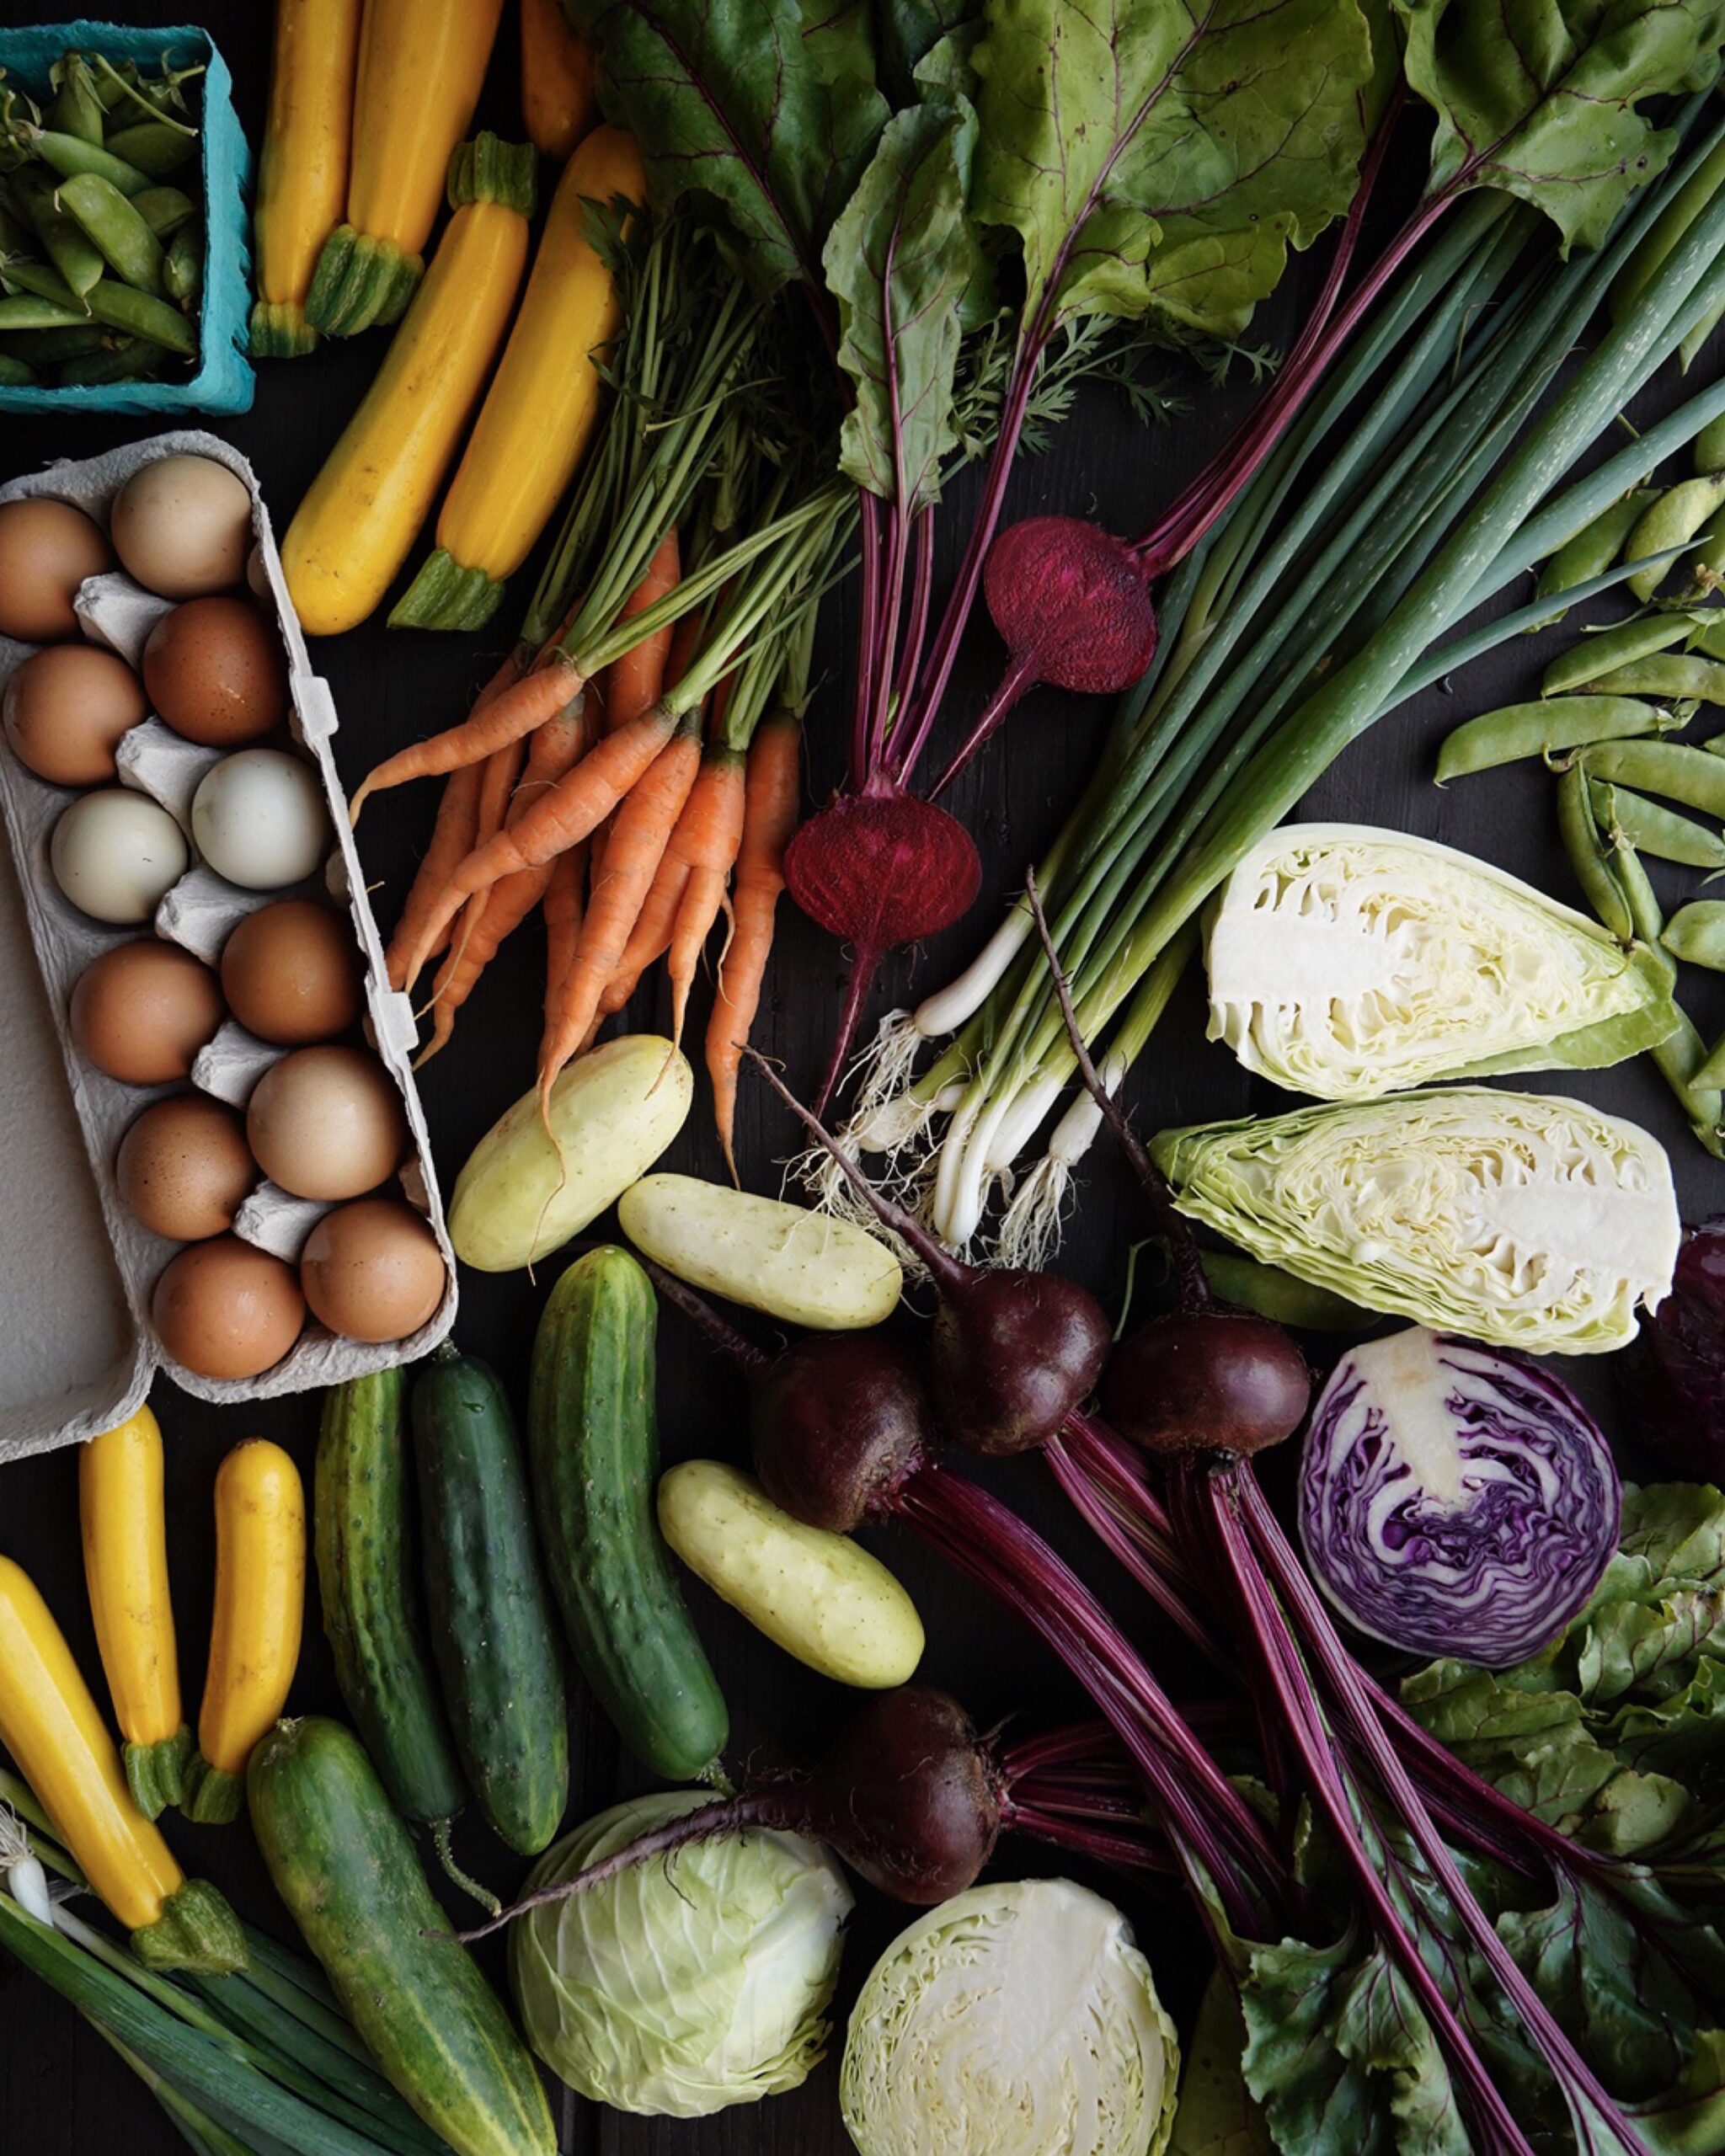
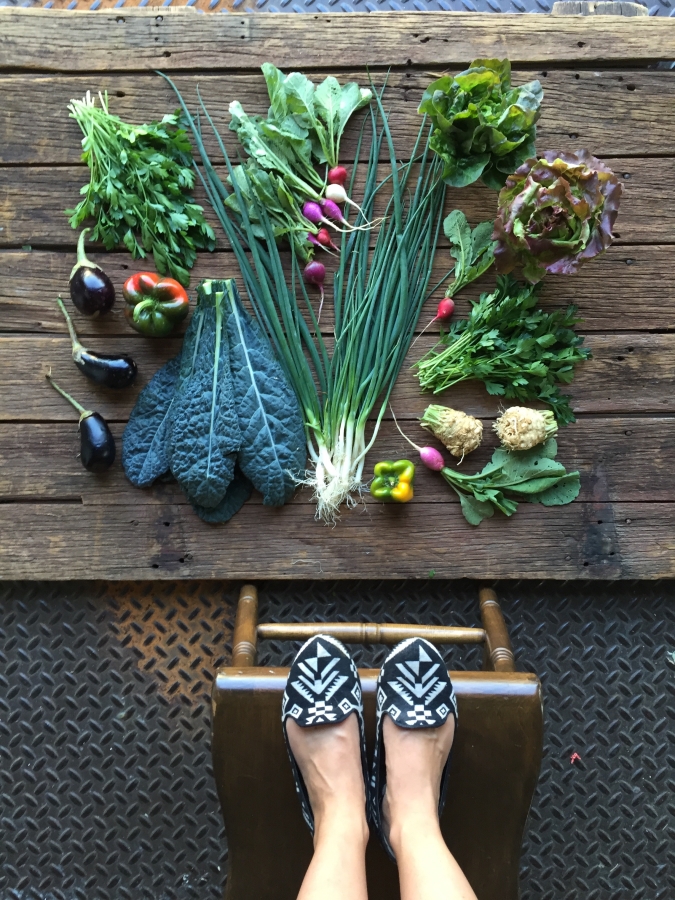
The Positioning
Shoot from overhead instead of from an angle. Place your subject/product on the ground or a table. Place your phone parallel to the surface, as high up as you need to get everything in the frame.
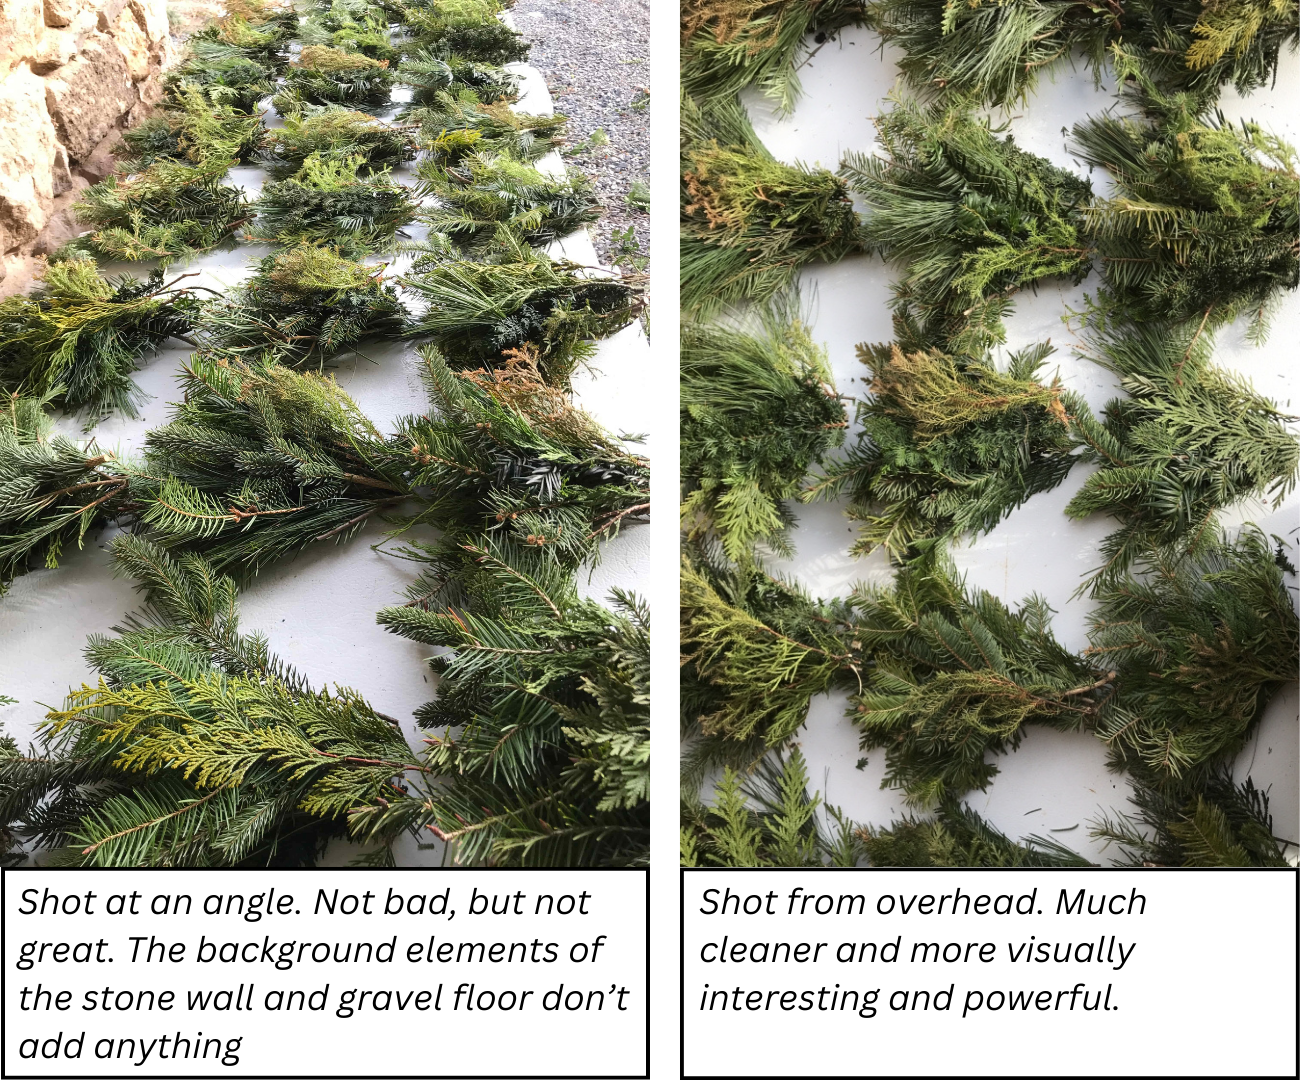
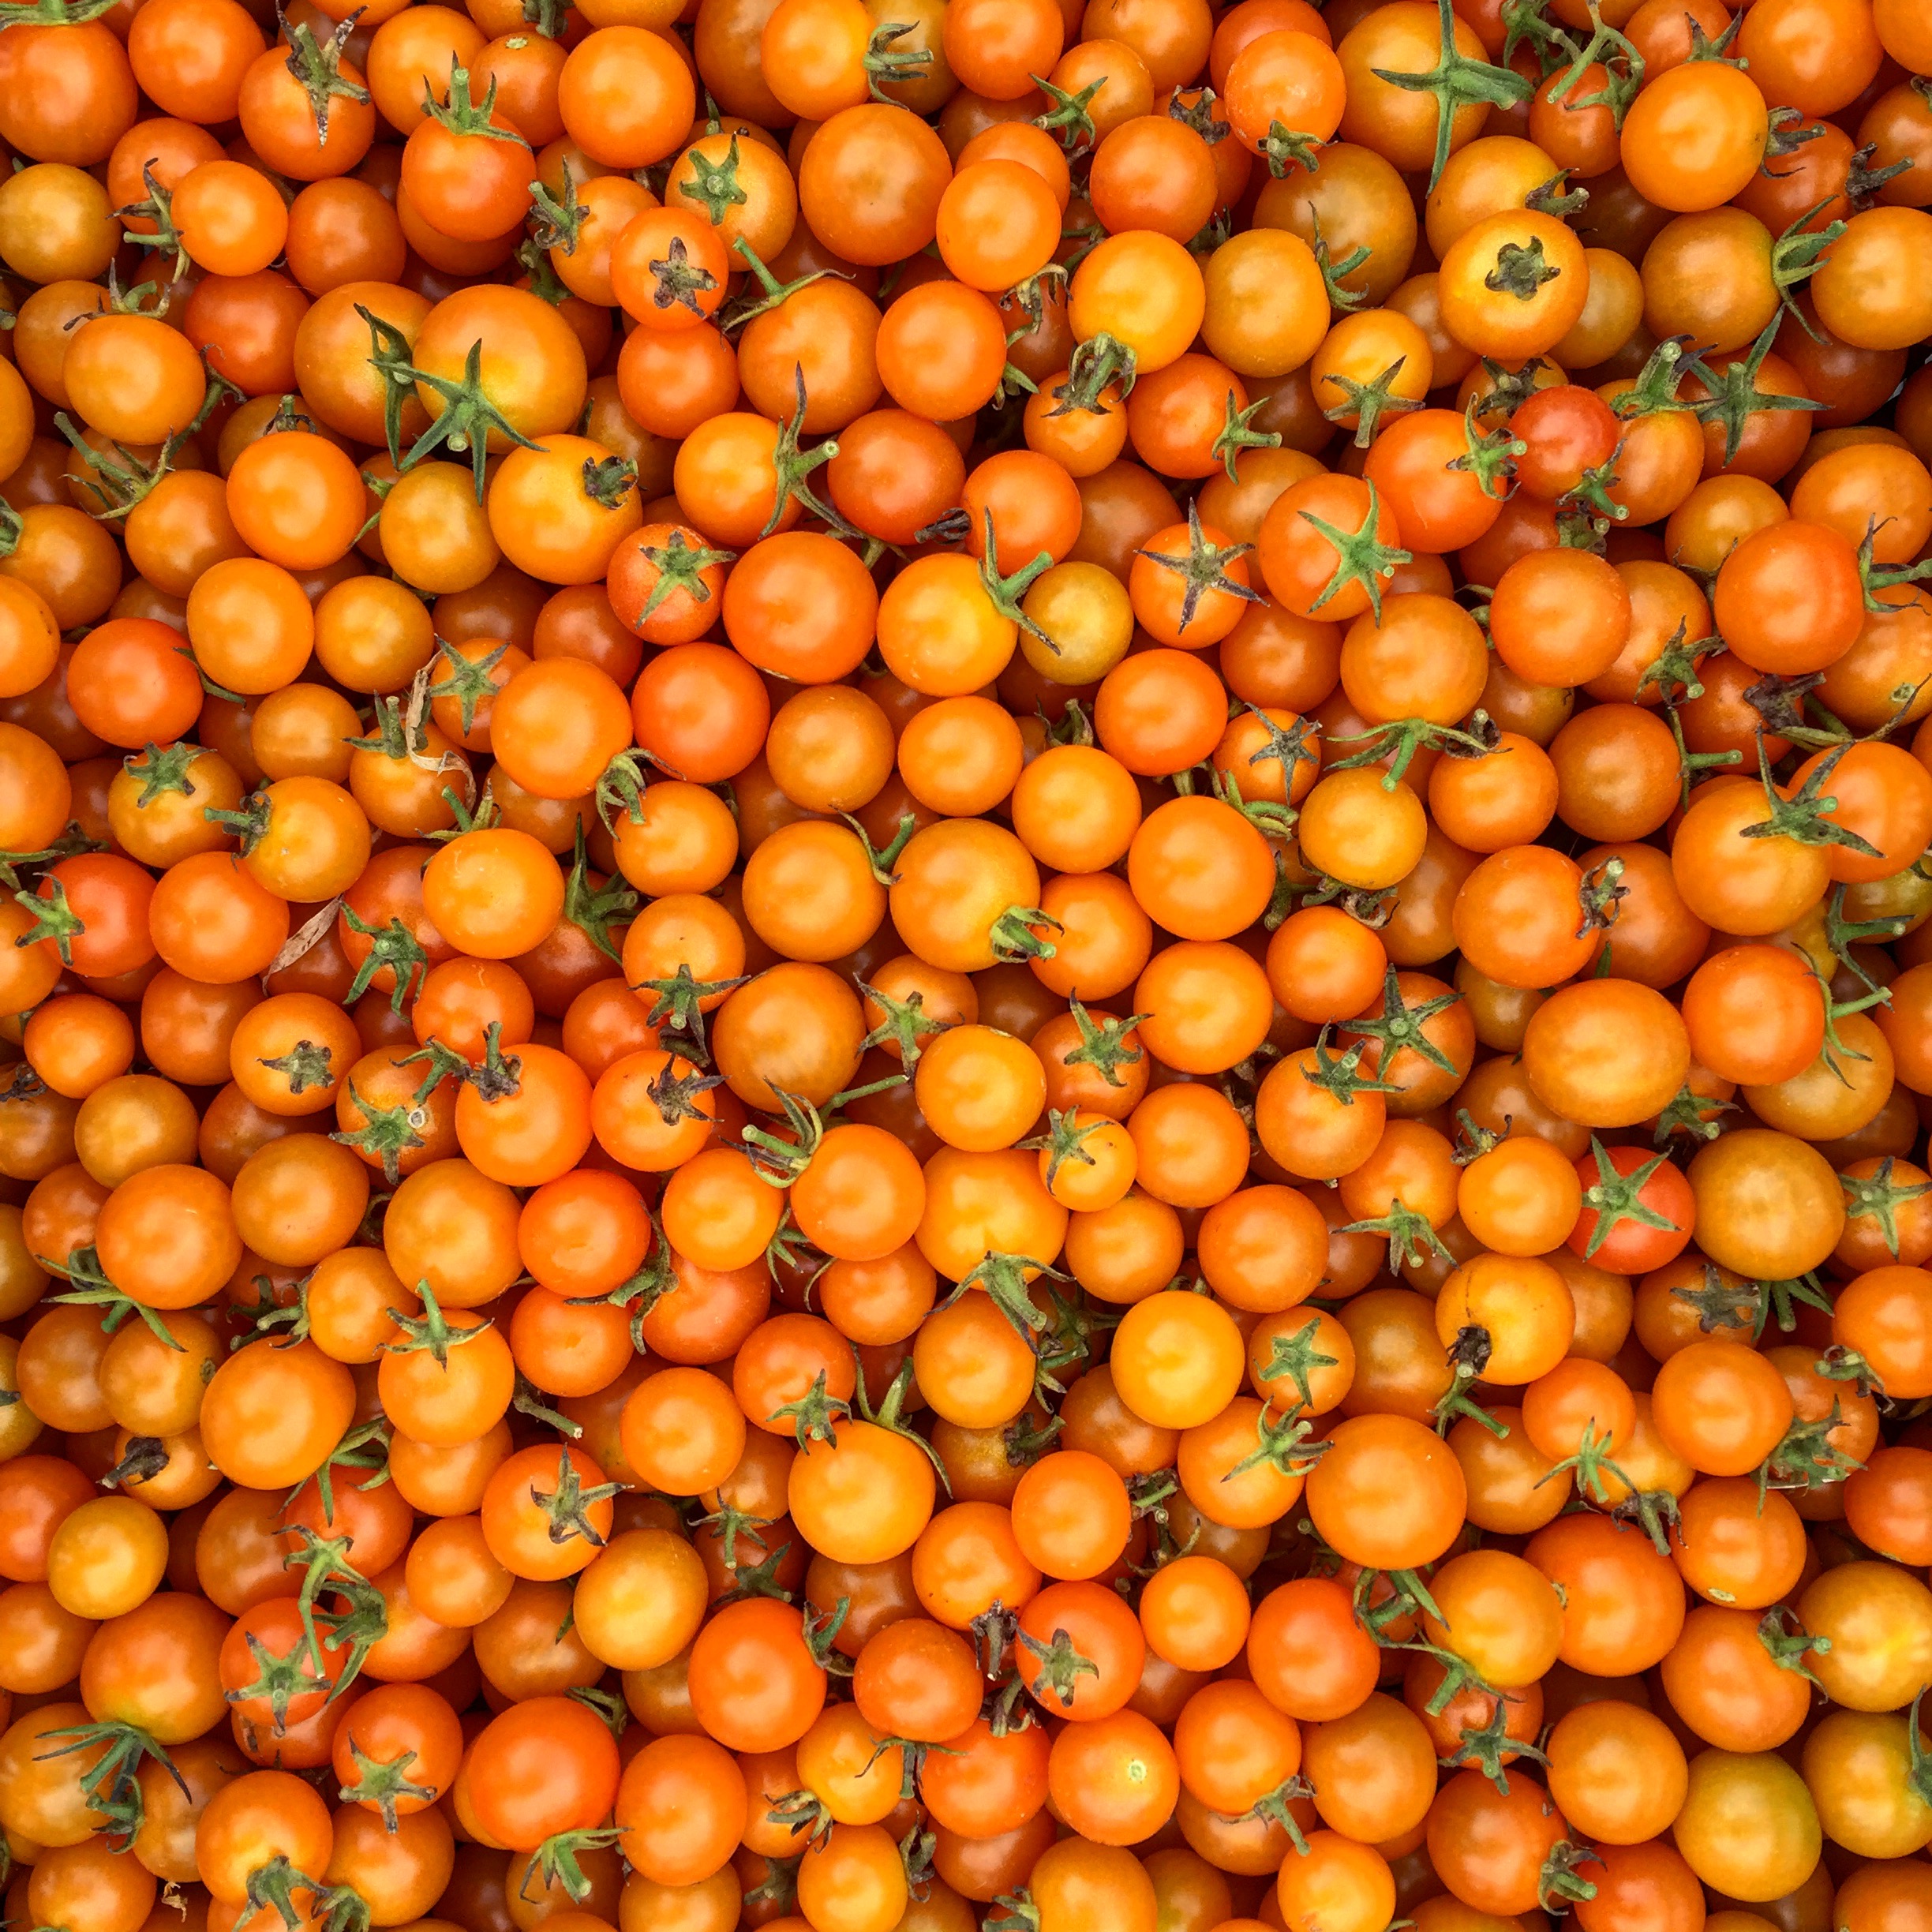
This works especially well for images with lots of elements inside the frame, like crates of veggies (see the tomato photo from above), boards that display a CSA or meat share, seedlings, etc. The overhead position ensures that you see everything in the image equally and creates a flat, all-over visual effect.
The Composition of the Shot
Tip #1: Eliminate clutter. This tip takes some practice to notice, but it makes a huge difference!
Before you shoot, look for random things in the background or on the subject of the image that could draw the eye away from what you intend. Think: dirty buckets, baling twine, random equipment/trucks/machinery, hair ties, stray plastic, dishes, cardboard boxes, plant matter, etc. Get rid of anything that doesn’t help tell the story of your product.
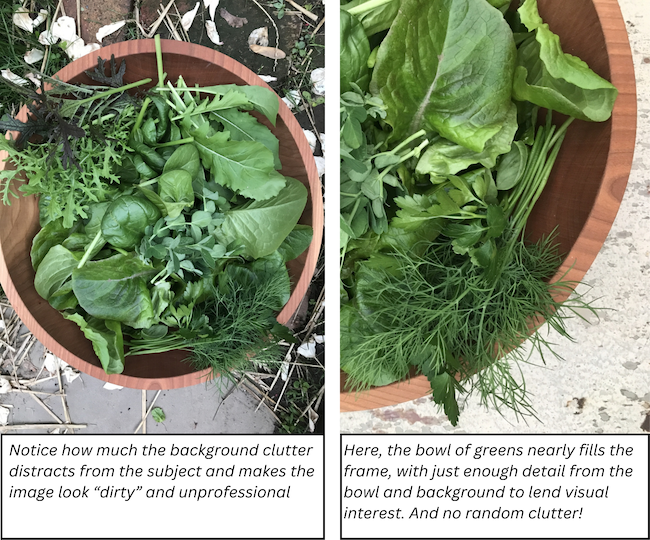
Tip #2: Crop in close. Let your subject completely or almost completely fill the frame. This keeps the focus on the product and not on random other elements. See the example of the salad greens above.
Tip #3: Eliminate any excess texture and detail when you can. Ideally, place your product or subject against a clean, blank background. Even stone or barn wood has a lot of texture and detail that, while beautiful on its own, can pull the eye away from the subject.
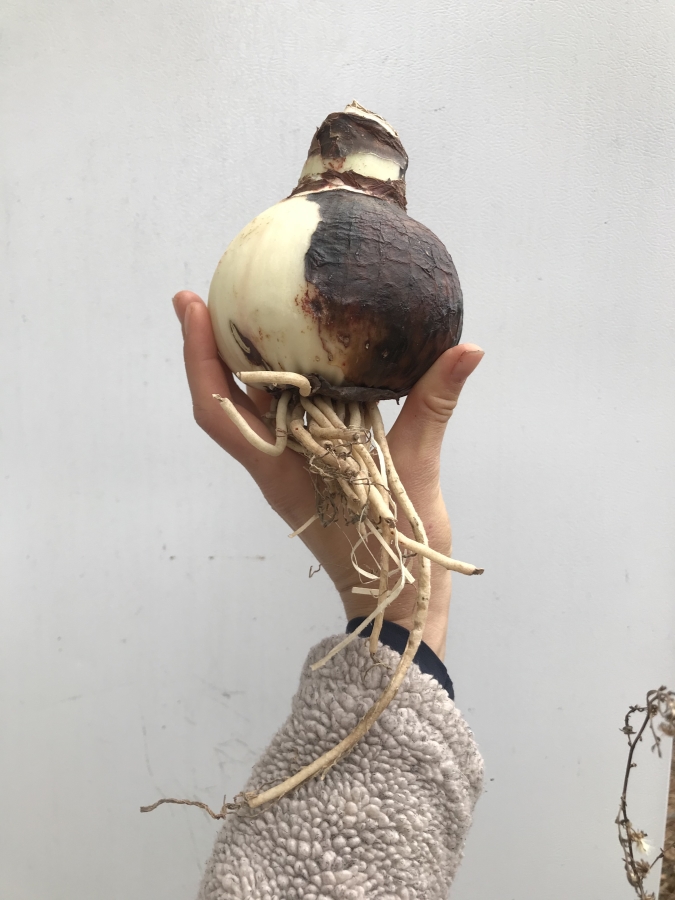
Photographing this amaryllis bulb against the blank background of a shipping container-turned-cooler really makes the subject pop. The image would be even stronger if that plant material wasn’t in the bottom right-hand corner.
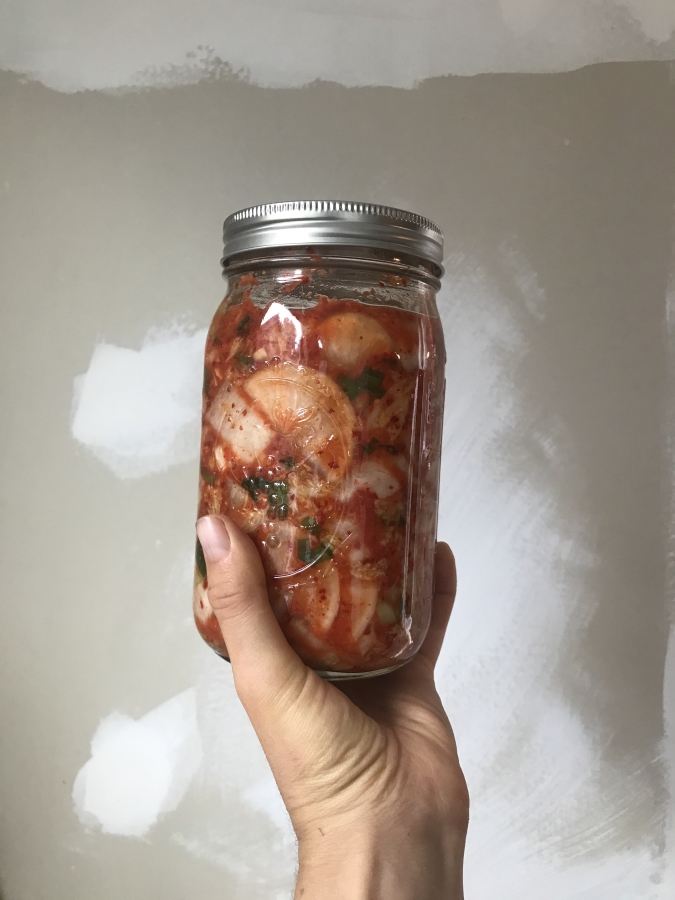
The unfinished drywall behind this jar of kimchi has just enough detail to be interesting without creating distraction from the subject.
Clean, focused imagery immediately draws in the viewer’s attention. Follow this tip and you’ll make a big difference in the quality and professionalism of your photography, regardless of the equipment you use.
Tip #4: Include a human element. The best way to do this is with a selfie!! People are interested in people, and your customers want to see the faces behind the business. If a selfie doesn’t make sense for your photo or you really can’t stomach the idea, consider including hands (see the amaryllis and kimchi photos above) or feet. This helps customers feel connected to you and your story.
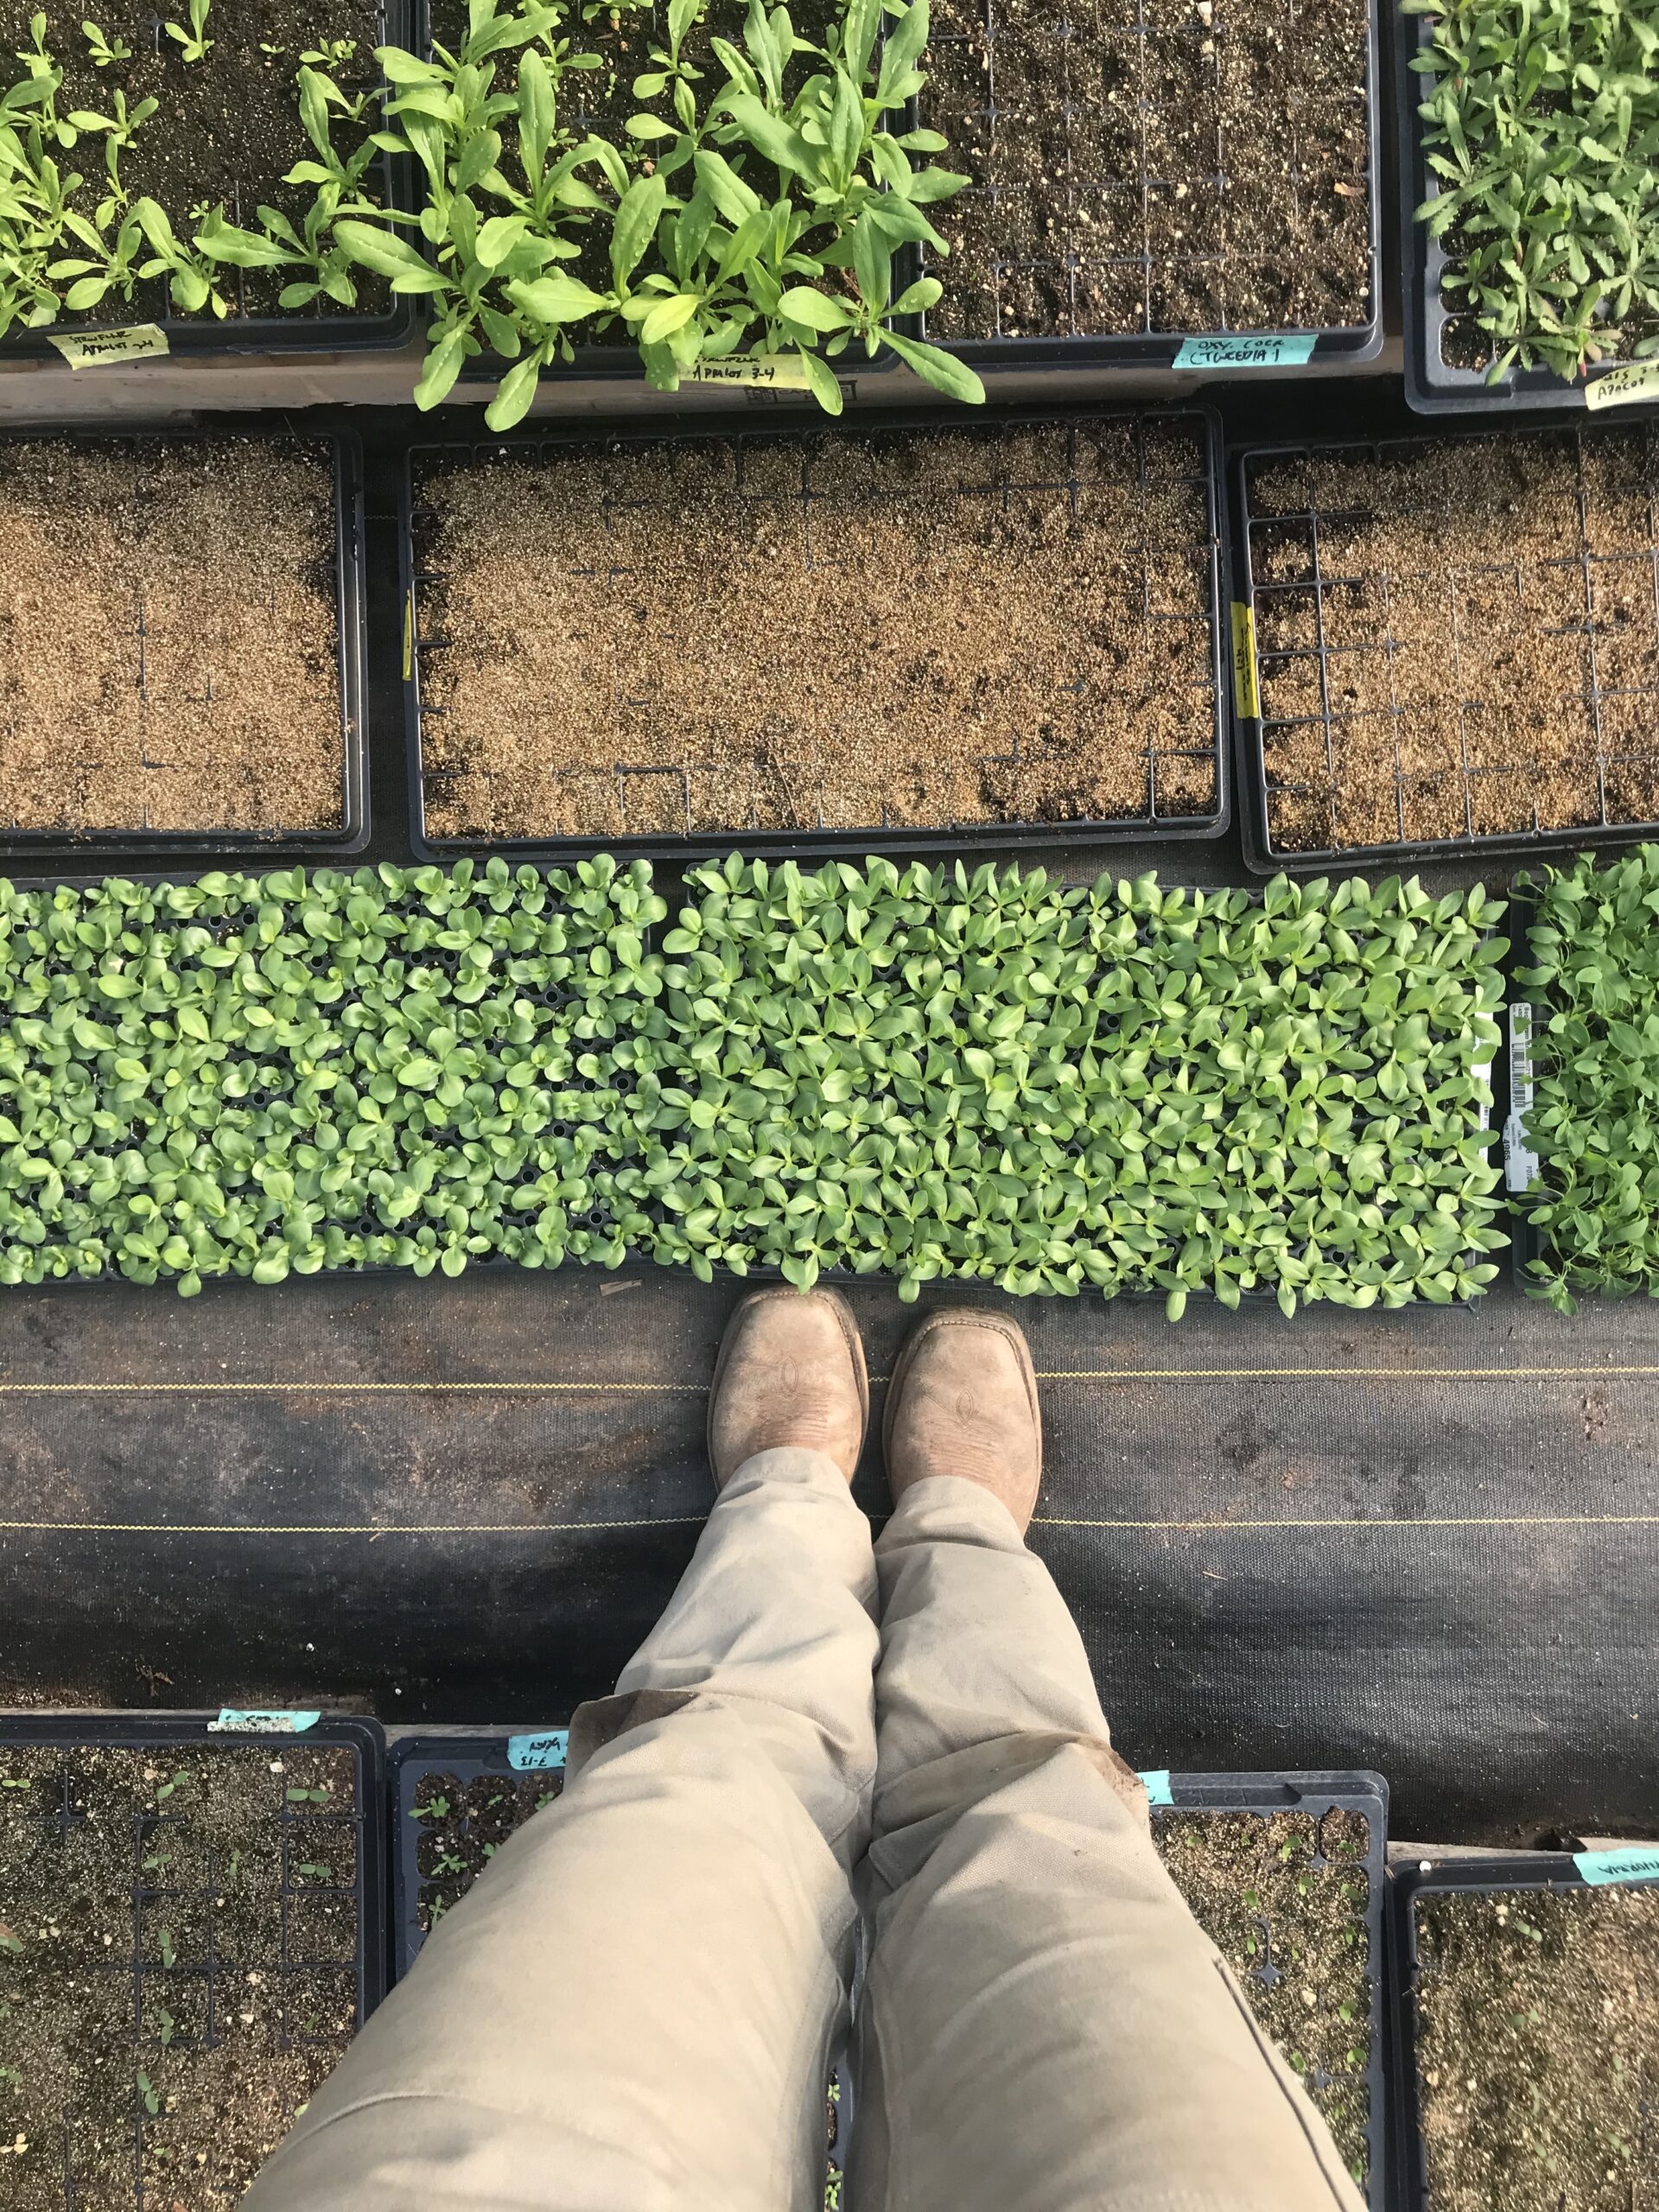
This photo would be a lot less interesting if it was just seedling trays. Including pants and boots draws the viewer into the experience of being there.
Lastly, have fun with it! Get used to taking photos more often. Practice really does make perfect, and the more you shoot, the faster you’ll be able to identify what looks great and what’s just “meh.” That said, don’t be afraid of “meh.” Customers care about consistent communication more than they care about meticulous execution, so get shooting.
